Technology has revolutionized server and application management and deployment. In the world of Linux, a powerful and versatile virtualization solution is Kernel-based Virtual Machine (KVM).
If you are using Ubuntu 22.04 and want to harness the capabilities of KVM, you’re in the right place. In this comprehensive guide, we will walk through the process of installing KVM, configuring it, and, if needed, removing it from your Ubuntu 22.04 system.
Prerequisites
Before diving into the installation process, you need to check a few prerequisites:
- Ubuntu 22.04: Make sure you have Ubuntu 22.04 installed and have administrator rights;
- Hardware Virtualization Support: Your processor must support hardware virtualization. You can check this by running the following command:
egrep -c ‘(vmx|svm)’ /proc/cpuinfo
If the result is greater than 0, your processor supports virtualization.
- Adequate Resources: Ensure that you have enough memory and disk space to comfortably run virtual machines.
How to Install KVM on Ubuntu 22.04?
KVM, an open-source virtualization technology, allows you to run multiple virtual machines simultaneously on a single Linux host machine, such as Ubuntu 22.04.
Its popularity stems from its exceptional performance, robust security features, and cost-effectiveness. KVM serves as a crucial middleware layer between virtual machines and the underlying hardware, providing universal virtualization capabilities for various architectures, including ARM and x86.
Below is a detailed description of the steps required to install KVM on Ubuntu 22.04.
Step 1: Update the System
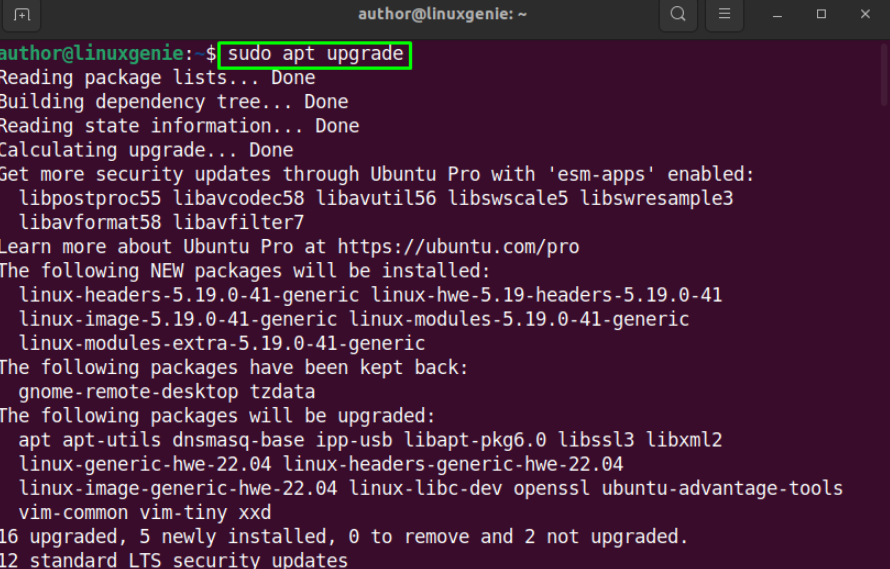
Begin by updating the system’s package list and upgrading existing packages to their latest versions. Open a terminal and run the following commands:
sudo apt update
sudo apt upgrade
Step 2: Install KVM Packages
To install KVM on Ubuntu, you need to install the necessary packages, including qemu-kvm, libvirt-daemon, and virt-manager. Execute the following command to install these packages:
sudo apt install qemu-kvm libvirt-daemon-system virt-manager
During installation, you’ll be prompted for confirmation. Enter ‘Y’ and press Enter to proceed.
Step 3: Start and Enable the libvirtd Service
The libvirtd service manages virtualization in Ubuntu. To ensure that it starts on boot and is currently running, execute the following commands:
sudo systemctl enable libvirtd
sudo systemctl start libvirtd
Step 4: Add User to the libvirt Group
To allow users to interact with virtualization tools without requiring superuser privileges each time, add them to the libvirt group:
sudo usermod -aG libvirt $(whoami)
After making these changes, you need to log out of the system and log back in for group membership to take effect.
Step 5: Verify KVM Installation
To confirm that KVM is installed correctly and your system is ready to create virtual machines, you can use the virt-host-validate tool:
virt-host-validate
This tool checks your system’s compatibility with KVM. Before proceeding, ensure that all checks return positive results.
How to Create a Virtual Machine (VM) using virt-manager
Now that KVM is installed, let’s create a virtual machine using the graphical interface provided by virt-manager. If you prefer working with the command line, you can use virsh, but in this guide, we’ll focus on virt-manager.
Step 1: Launch virt-manager.
You can start virt-manager by finding it in the Ubuntu Applications menu or by running the following command in the terminal:
virt-manager
Step 2: Connect to the Hypervisor
When you launch virt-manager, it will automatically attempt to connect to the KVM hypervisor. If it doesn’t, you can add the connection manually:
- Click the “File” button in the top menu;
- Select “Add Connection.”;
- Choose “QEMU/KVM” as the hypervisor and leave the connection method as “Local.”
Step 3: Initiate a New Virtual Environment
After establishing a connection, begin the process of setting up a fresh virtual environment:
- Navigate to the “File” option on the upper toolbar;
- Choose “Create New Virtual Environment.”
Proceed with the setup guide to customize your virtual environment, detailing aspects like the source for installation, type of operating system, and resource allocation. Opt for either an ISO file or an existing setup for installation.
Step 4: Finalize the Setup
Wrap up the customization process by picking the settings that meet your criteria. Define the RAM size, CPU count, and available storage for your virtual environment. Once satisfied with your selections, hit the “Complete” button.
Step 5: Implement the Operating System
Now that your virtual environment is established, it’s time to get it running and set up your operating system of choice. To execute this:
- Locate your newly created virtual environment in the virt-manager dashboard;
- Press the “Activate” button to access the virtual environment’s control panel;
- Carry on with the OS installation, following the procedure you would for a hardware-based system.
Congratulations! You’ve successfully set up KVM on Ubuntu 22.04 and inaugurated your inaugural virtual environment. Next, we’ll delve into the steps for disengaging and deleting KVM from your setup if ever required.
How to Remove/Uninstall KVM on Ubuntu 22.04
There may be instances when KVM is no longer needed in your system, or you need to perform a clean removal to resolve issues. To remove KVM from your Ubuntu 22.04 system follow these next steps:
- Step 1: Remove Virtual Machines. Before removing KVM, you should delete all virtual machines that you have created. Use virt-manager or virsh to stop and remove the virtual machines. Prior to doing this, make sure to create backups of any important data and configurations;
- Step 2: Stop the libvirtd Service. Stop the libvirtd service, which manages virtualization in your system, using the following command:
sudo systemctl stop libvirtd
- Step 3: Uninstall KVM Packages. Now, uninstall the previously installed KVM packages. Execute the following command to remove packages related to KVM:
sudo apt remove –auto-remove qemu-kvm libvirt-daemon-system virt-manager
This command will remove the packages and any dependencies that are no longer needed.
- Step 4: Clean Configuration Files. To ensure a clean removal, you can clean the configuration files of the removed packages. This step is optional but recommended:
sudo apt purge –auto-remove qemu-kvm libvirt-daemon-system virt-manager
- Step 5: Remove User from the libvirt Group. If you added your user to the libvirt group during the installation process, you should remove it to revoke associated privileges:
sudo deluser $(whoami) libvirt
- Step 6: Cleanup. To remove all remaining files and configurations related to KVM, you can use the following command:
sudo apt autoclean
This command will clean up all cached package files that are no longer needed.
- Step 7: Verify Uninstallation. To confirm the successful uninstallation of KVM and its related packages, you can execute the following command:
virt-host-validate
This tool should provide a message indicating that virtualization is unavailable, indicating that KVM has been removed.
- Step 8: Reboot the System. After removing KVM, it is recommended to reboot the system to ensure that all changes take effect:
sudo reboot
Conclusion
In this tutorial, the steps for installing KVM on the Ubuntu 22.04 platform have been discussed, along with the procedure for establishing a virtual environment via virt-manager and the methodology for KVM removal. KVM stands as a robust platform for virtualization, facilitating Linux aficionados in the effective orchestration and execution of virtual systems.
Be mindful that the demands of virtualization can be considerable; therefore, ascertain that your hardware setup is up to the task and that sufficient computational resources are available. Utilizing KVM allows you to craft and oversee virtual solutions that cater to your specific requirements, all under the dependable framework of Ubuntu 22.04.